It has become a tradition at Apple that after every iOS release, devices begin to face battery drain issues. The latest iOS 11 fails to escape this tradition and it drains your iPhone and iPad battery once you install iOS 11. Users, in their efforts to improve iOS 11 battery life on iPhone and iPad, resort to many solutions.
We will list a number of solutions that can help in fixing iOS 11 battery drain problem on iPhone and iPad. You can try a few or all (if not satisfied by a few solutions) on your iPhone and iPad running iOS 11.

How to Improve Battery Life of iPhone and iPad in iOS 11
Quick Navigation
- Keep a Track of the Battery Usage
- Reboot your iDevice
- Turn Off Wi-Fi and Bluetooth When Not Needed
- Stop AutoPlay Videos in App Store
- Transfer Photos from iPhone to Mac or Windows PC in Compatible Format
- Click High-Efficiency Photos and Videos
- Take control of Background App Refresh
- Use Location Services Wisely
- Disable Auto-Fetching of New Data
- Adjust Display & Brightness to the Right Perspective
- Disable Automatic Downloads and Updates
- Turn On Low Power Mode
- Allow Notifications Only from Selected Apps
- Enable Low-Quality Image Mode for Messages
- Disable “Messages on iCloud”
- Update Apps
- Clear Apps History
- Update iOS
#1. Keep a track of Battery Usage
Smart is the user who is vigilant about the app that drains the battery. Apple provides an excellent feature to check which app is draining how much battery in the last 24 hours and in the last week.
Step #1: Launch Settings → Battery.

Here, you can check BATTERY USAGE option under Battery Percentage. You will find two tabs: Last 24 Hours and Last 7 Days. One by one, you can check battery usage by different apps in last 24 hours and last seven days.
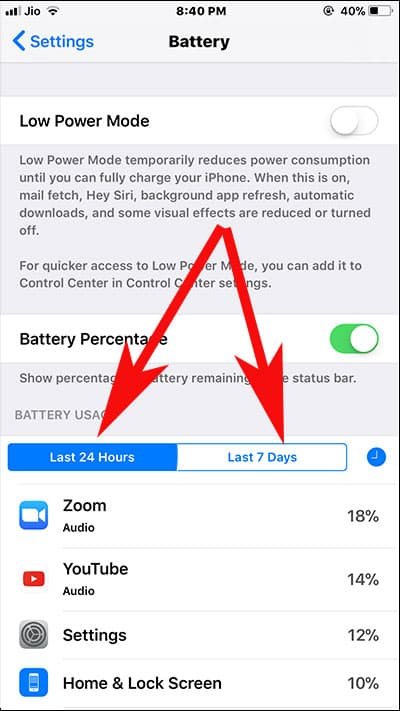
To gain precise number, you can tap on the clock icon next to ‘Last 7 Days’ tab. Tap on the clock and you will get to know minutes you spend on a particular app and the minutes the app is running in the background.
Also Check: Best iPhone X Power Banks and Best iPhone X Battery Cases
#2. Reboot Your iOS 11 Device
Rebooting your device comes into the picture every time your iPhone or iPad meets technical issue. Surprisingly, this solution works many times, and therefore, people are advised to reboot iOS 11 device. The process is simple: press and hold the home button and power button simultaneously for 10 seconds on iPhone. Note that if you have iPhone 7 or 7 Plus, you need to follow a different process to reboot iPhone 7. Follow this guide to reboot iPhone X, iPhone 8 and iPhone 8 Plus
#3. Turn off Wi-Fi and Bluetooth
If you keep Wi-fi network on your phone open, you will be receiving messages and notifications constantly. Bluetooth is notorious for consuming battery on your iPhone or iPad, and therefore, you should keep both the features turned off when you are not using them.
There are two ways you can turn off Bluetooth and Wi-fi on your iPhone: first, simply swipe up on your iPhone home screen to bring up Control Center; from there, you can turn off both these options.
Second, open Settings → Wi-Fi/Bluetooth.


#4. Stop AutoPlay Videos in App Store
The newly designed App Store shows you previews of apps and games; basically, this is a part of Apple’s promotional activity. But it obviously takes a toll on the battery of your iOS device. You can always stop such Auto Play videos in App Store to improve iOS 11 battery life.
Step #1: Launch Settings app on your iPhone.
Step #2: Now scroll down and tap on iTunes & App Store.
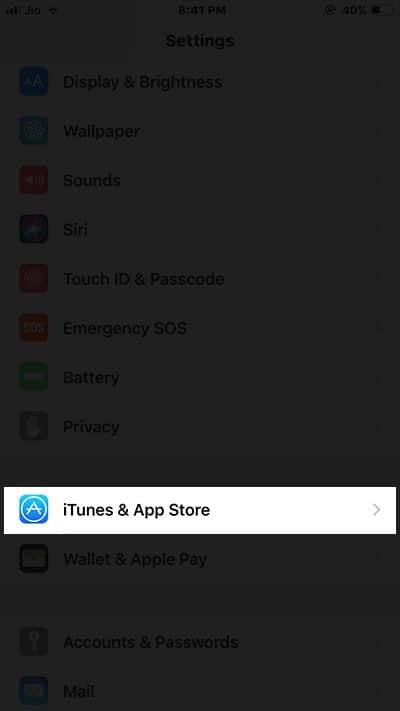
Step #3: Next, tap on Auto Play Videos option.

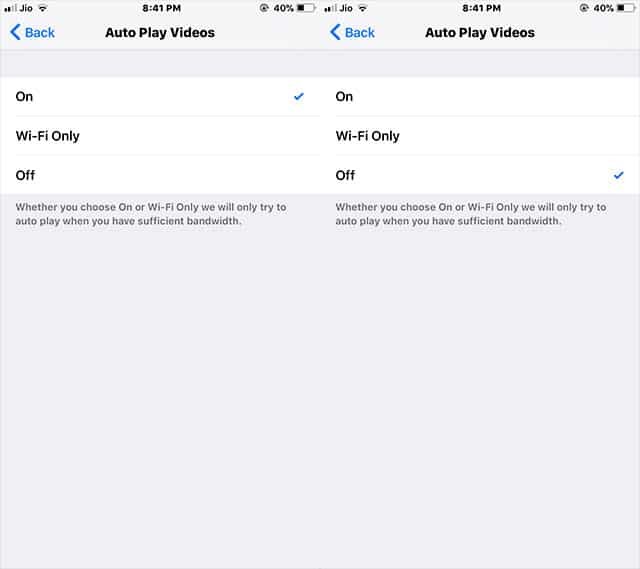
Step #4: Here, you can see three options: On, Wi-Fi Only, and Off.
You need to tap on Off.
#5. Transfer Photos from iPhone to Mac or Windows PC in Compatible Format
Transferring images or photos to Mac or PC helps you save battery life on your iPhone or iPad; moreover, this procedure will also help you consume less data on your device.
Move Photos/Videos from iPhone to Mac/PC in Compatible Format
Step #1: Open Settings on your iPhone or iPad.
Step #2: Now tap on Camera after scrolling down.
Step #3: Next, you need to tap on Formats.
Step #4: You will find two options under TRANSFER TO MAC OR PC section: Automatic and Keep Originals. You should tap on Automatic.
This will ensure automatic transfer of your shots in a compatible format.
#6. Click High-Efficiency Photos and Videos
High-efficiency photo is an awesome feature introduced in iOS 11 by Apple. This feature not only reduces file size up to 50% but also retains the image quality. Once you capture high-efficiency photos and videos, you can easily share or send the shots to your friends and loved ones smoothly.
Take Photos in HEIF/HEVC Format
Step #1: Open Settings on your iPhone/iPad.
Step #2: Now, scroll down and tap on Camera.
Step #3: Next, you need to tap on Formats.
Step #4: You will find two options under CAMERA CAPTURE section: High Efficiency and Most Suitable.
You are advised to select High Efficiency. This will save all your images in HEIF and videos will be saved in HEVC.mov file.
#7. Manage Background App Refresh
Whenever you close an app on your iPhone or iPad, the app remains open in the background and data get refreshed automatically. This certainly consumes a lot of battery on your iOS device. Probably, you don’t want to turn this feature off entirely as you access some apps frequently. In this case, you can select a few most used apps and keep them on even in the background.
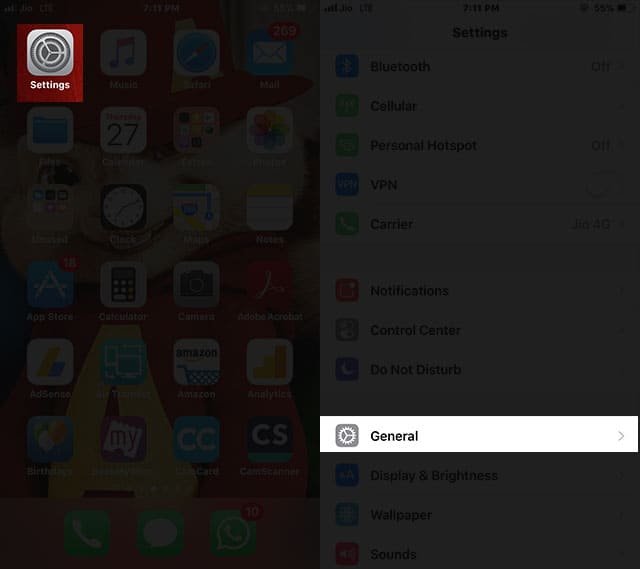
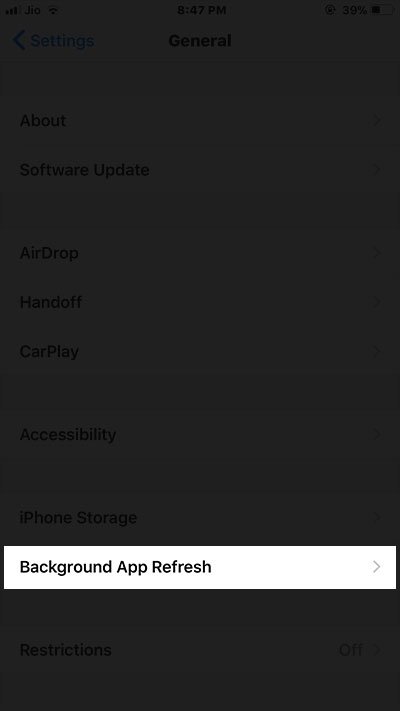
Step #1: Launch Settings app → General.
Step #2: Now tap on Background App Refresh.
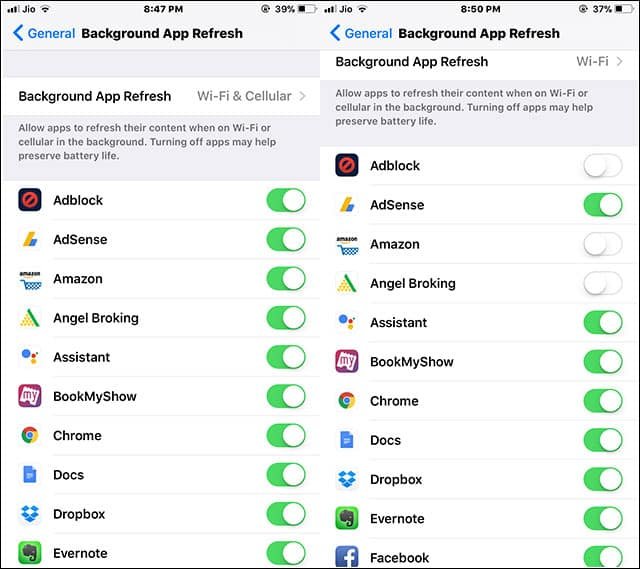
Step #3: Next, tap on Background App Refresh and you will find three options: Off, Wi-Fi, and Wi-Fi & Cellular Data.

You can choose Off during the night when you don’t check messages or notifications in apps.
Alternatively, to keep some frequently accessed apps ON, toggle the switch OFF seen next to the apps.
#8. Use Location Services Judiciously
Location Services is another power consuming feature on your iPhone and iPad, and therefore, you need to use this judiciously. The reason behind its power consumption is continuous use of GPS. Not all apps need to keep a watch on your location; so turn off the Location Services for unnecessary apps.
Step #1: Open Settings → Privacy.
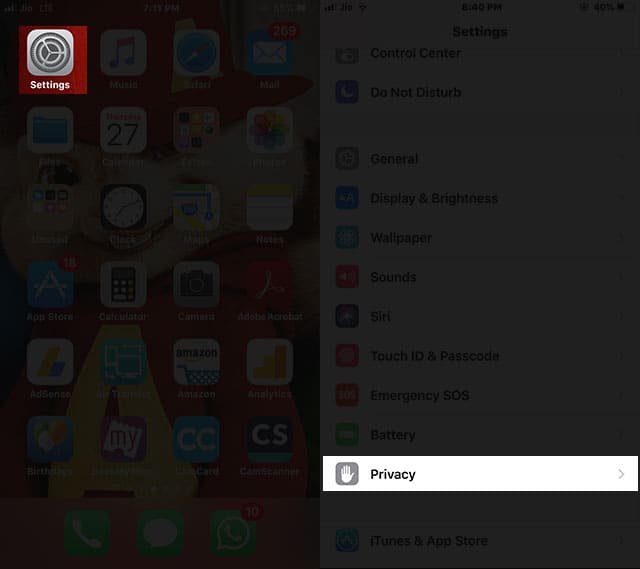
Step #2: Now tap on Location Services.

Step #3: Next, tap on each app for which you want to turn off Location Services.
Step #4: You get two options: Never and While Using the App under ALLOW LOCATION ACCESS.
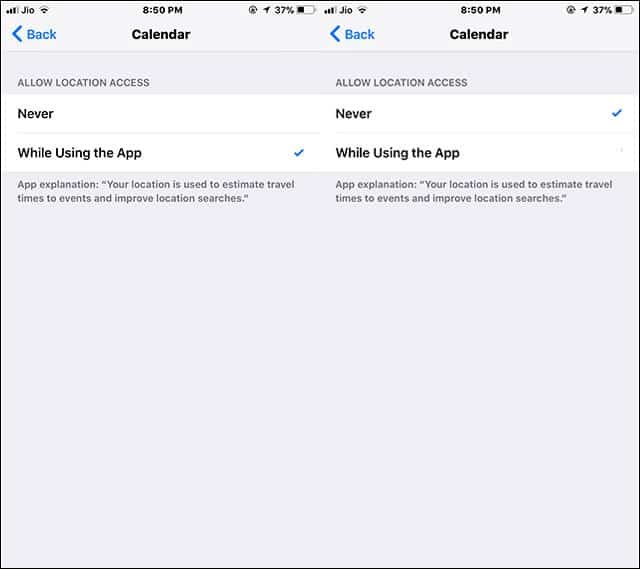
You can either choose Never or While Using the App. Note that some apps like Google Maps, Uber, Weather, and WhatsApp have a third option of Always.
#9. Stop Auto-Fetching of New Data
When you receive emails on your iCloud or configured Gmail (or any other mail client), your iPhone automatically fetches new data; and this causes battery consumption. Well, you can manage this auto-fetching of new data in your iPhone.
Step #1: Open Settings and then Accounts & Passwords.
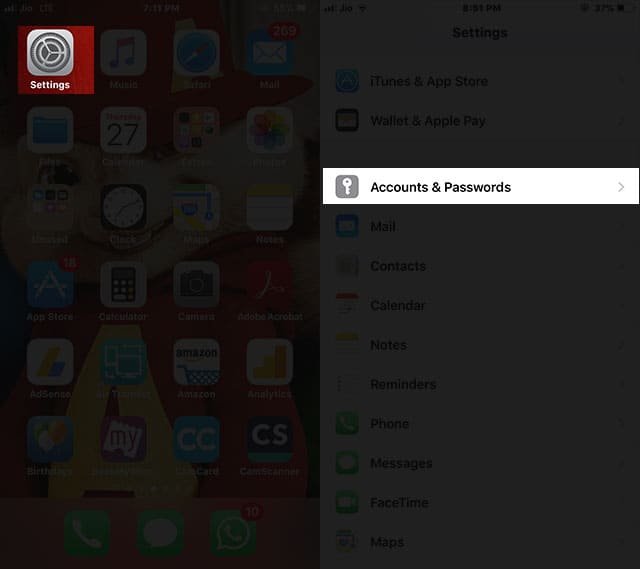
Step #2: Now tap on Fetch New Data.

Step #3: You can now toggle the Push button OFF.
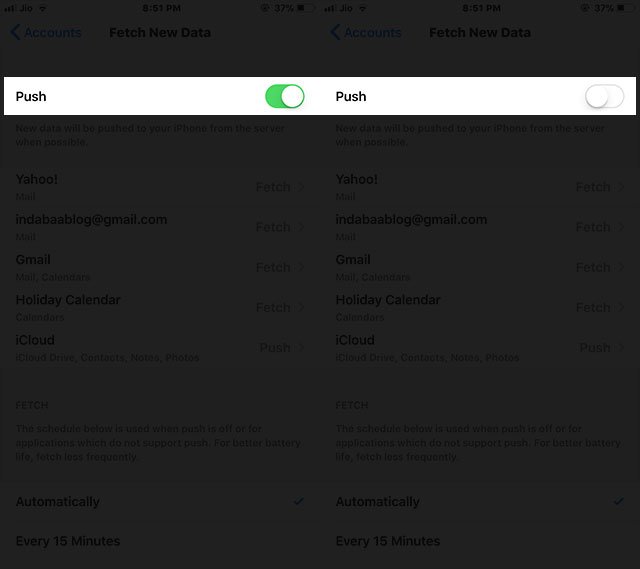
Alternatively, you can manage particular account like iCloud or Google. Tap on the account you want to manage and then select Manual.

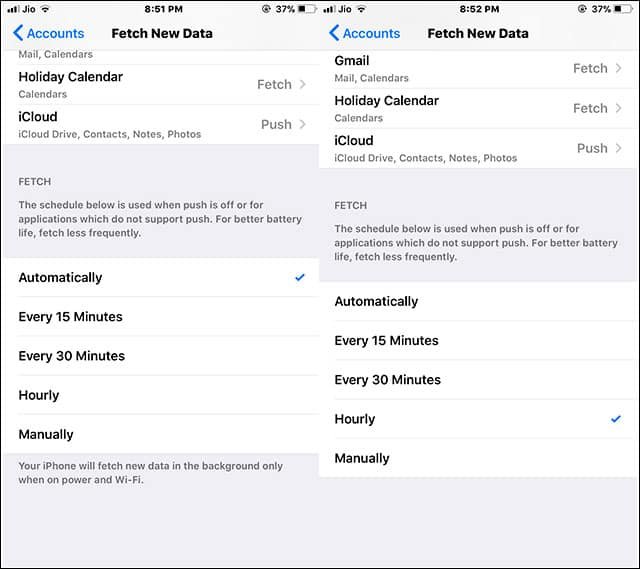
If the above two solutions are not acceptable, you can schedule the push of new data. Select any one option from the list of 15 Minutes, 30 Minutes, Hourly etc.
#10. Control Display & Brightness
Step #1: Open Settings → Display & Brightness.
Step #2: Now turn off Auto-Brightness option.
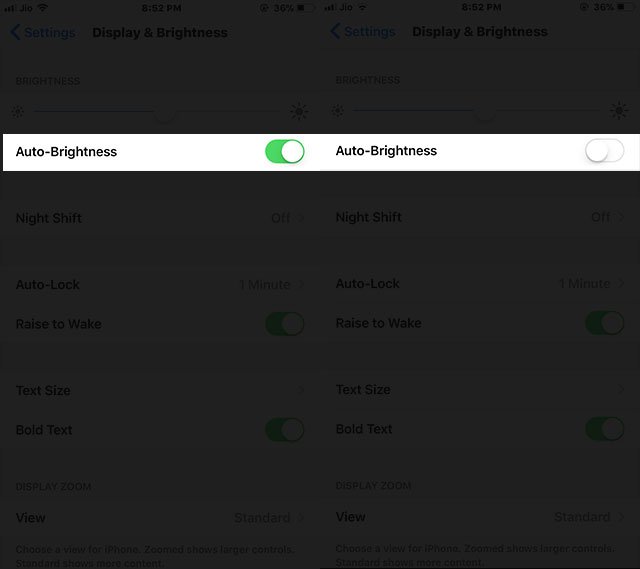
Moreover, you should also keep auto-lock to a minimum, i.e. 30 seconds, on your iPhone to save battery life.

#11. Stop Auto Downloads and Updates
If you are using more than one iOS devices and the devices are connected with the same iCloud account, you should turn off auto downloads and updates feature. When you purchase anything from iTunes or App Store on one device, the same items are automatically downloaded on other connected devices.
Step #1: Launch Settings and then tap on iTunes & App Store.

Step #2: Next, turn off Automatic Downloads of Music, Apps, Books & Audiobooks, and Updates.

#12. Put your device in Low Power Mode
Low Power Mode is the real battery saver; this feature was first introduced in iOS 9. Low Power Mode not only saves battery but also tells you which app consumes how much battery on your device. Once you enable this feature, it will quickly start saving battery by disabling some power-eating features like Hey Siri, New Data Fetch, background app refresh etc. Moreover, you can also notice low visual effects.
Step #1: Go to Settings and then tap on Battery.
Step #2: Toggle the switch of Low Power Mode, which is the first option.
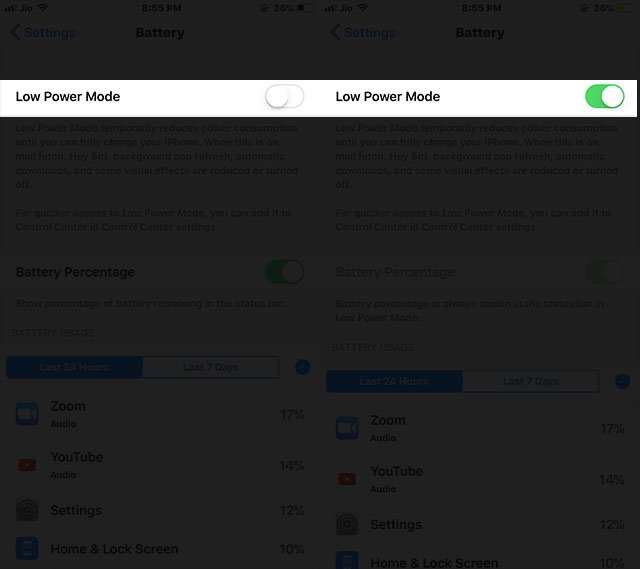
You will see the battery icon (top left) turn yellow.
#13. Receive Notifications from Selected Apps
Notifications for all apps don’t deserve your attention, and therefore, you should turn off notifications on some apps.
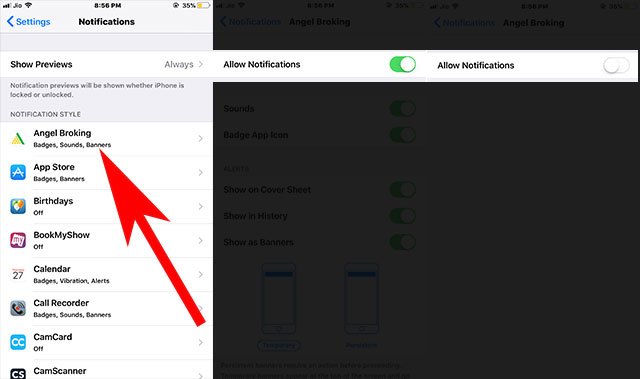
Step #1: Open Settings and then tap on Notifications.
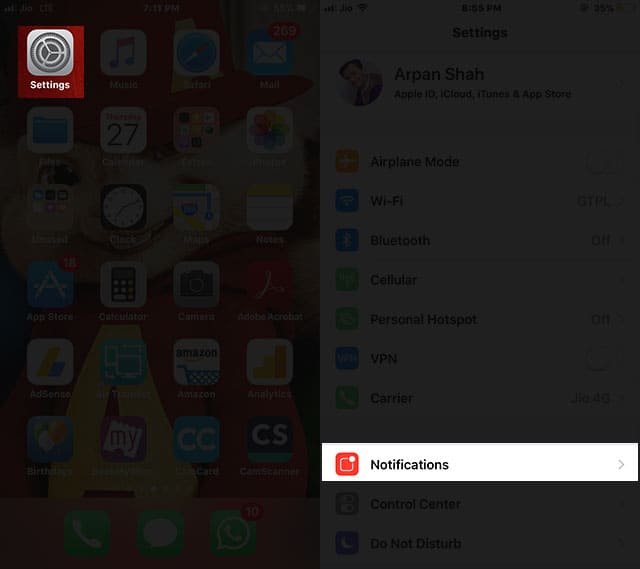
Step #2: Now tap on the app from which you don’t need to get notifications; next, toggle the Allow Notifications switch OFF for that app.
#14. Turn On Low-Quality Image Mode for Messages
If you are in the habit of sharing images on Messages app, you should enable Low-Quality Image Mode on your iPhone. As the name suggests, this feature will send low-quality images and consume less battery; you can send low-quality images even as the internet connection is poor.
Step #1: Launch Settings and go to Messages.
Step #2: Scroll down to the bottom and toggle Low-Quality Image Mode ON.
#15. Do Not Sync Messages with iCloud
When you sync Messages with iCloud, Apple eco-system enables you to access all your messages from all Apple devices including Mac and iPad. But this feature bites a bigger morsel of your device battery. So, it is better to disable Messages on the iCloud feature on your iPhone. We have a complete guide on how you can sync, enable, disable Messages with iCloud in macOS High Sierra and iOS 11.
#16. App Update
You need to keep an eye on the App Store and check if an app update is pending. Developers continuously introduce new features to make their apps user-friendly. If you do not update your apps regularly, you may miss out some important features that may save battery life in iOS 11.
Step #1: Launch App Store on your device.
Step #2: Tap on Updates option from the bottom.
Step #3: Now tap on Update All to update apps. (Check our guide on how to fix iOS 11 apps not updating or downloading issue)
#17. Clear App History
List a number of apps that store data; apps like WhatsApp, Snapchat, Safari, Dropbox, Facebook etc. pile up data and therefore, such apps will surely consume more battery. You need to clear app history to ensure smooth function of apps on your iOS 11 device.
- How to Clear Apple New App History
- How to Clear Snapchat Conversations History
- How to Clear iPhone and iPad RAM
- How to Clear Safari Browsing History & Cookies
- How to Offload Apps on iPhone and iPad
- How to Clear Dropbox Cache on iPhone and iPad
Moreover, clearing documents and data on iPhone or iPad can also help you create some space, and thus, save battery.
#18. Update Your iPhone/iPad to the Latest iOS Version
Using an older iOS version is not a smart move; you need to update your iPhone or iPad to the latest operating system. This can fix a lot of issues including battery life problems on iPhone and iPad.
Step #1: Open Settings and go to General.
Step #2: Now tap on Software Update.
If there is any latest software update, simply download and install it on your device.
Is there any other solution left? We would love to hear from you about improving iOS battery life. Share your feedback with us on Facebook, Twitter and Google Plus.